Eggless Whole Wheat Cake – No Added Sugar

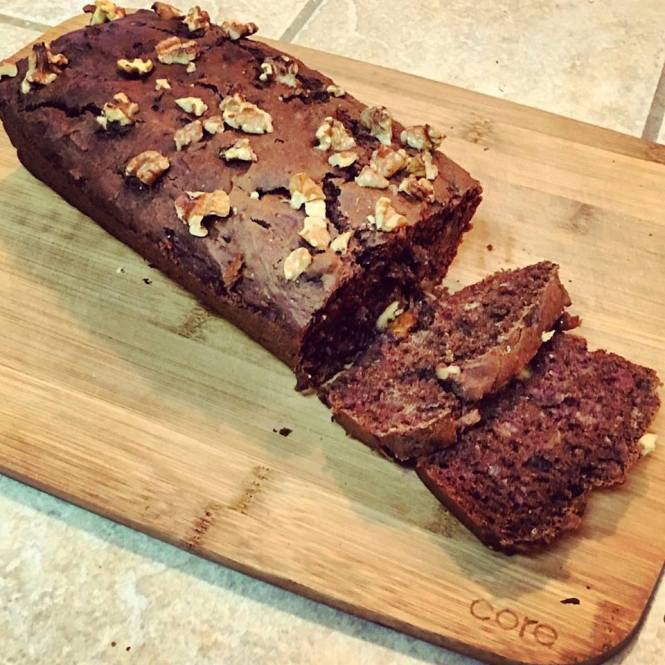
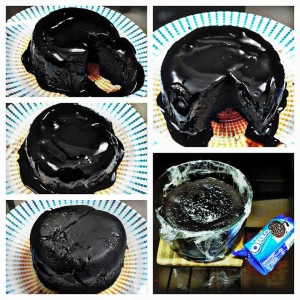
While Surfing the net I came across this interesting recipe of Whole wheat cake. I felt it worth giving it a shot. I prepared it with some of my personal modification. It turned out just awesome. No one could ever tell you if it is made from whole wheat & that too without any sugar added to it. Yes all natural sugar. This cake stood true to the regular one, it had the moistness, taste. It is healthy, guilt free & tasty. We rarely get all the 3 combination Healthy, Tasty, Guilt Free.

wheat-cake


Ingredients

  • 1 ⅓ cup Whole Wheat flour
  • 325 gms. Pitted Dates
  • 1 tsp Baking Powder
  • 1 tsp Baking Soda
  • ¼ cup Butter (Room Temp)
  • 1 tbs Oil
  • 1-2 tbs. Splenda (Optional.)
  • A pinch Salt
  • Salt to taste
  • 1 tsp. Vinegar
  • 1 ½ cup Warm milk
  • 3-4 tbs. Unsweetened Cocoa powder
  • ½ cups Any Nuts (Walnuts, Almonds, Cashew, and Pistachio etc.)

Method

  1. Pulse the Dates in a blender (Keep the consistency as per your preference. I completely crushed them)
  2. Pre-Heat Oven at 180 ° C or (350 ° F).
  3. In a bowl Add butter + Oil & Flour. Rub it with hands and ensure that the flour is moist.
  4. Add Cocoa powder + Salt + Baking Powder + Baking Soda + Splenda (Optional) & mix well.
  5. In half cup milk add Vinegar + Vanilla Essence
  6. Add the Dates mixture to the flour + 1/2 cup milk. Stir well
  7. Now add the remaining Milk to mix.
  8. Add half of the Nuts
  9. Pour the batter in a greased cake tin.
  10. Drizzle the remaining nuts over the batter.
  11. Bake the cake for 45-50 mins. (Keep checking the cake after 45 mins.)
  12. Insert a toothpick or knife. If it comes out clean remove from the oven.
  13. After 10 mins remove from the Tin
  14. Let it cool & then serve.

Eggless SugarFree Carrot Cake

One of my favorite tea time bites is the carrot cake. It comes out perfect every time and has a delectably amazing flavor of all spice along with the light & spongy texture. The best bet is that it is sugar free & you don’t really have to count the sugar calorie count. Here goes the recipe. Hope you enjoy making it.

Carrot cake


Ingredients

  • 1 cup All Purpose Flour
  • ¾ cup grated Carrot
  • ¾ cup Splenda (or any other sugar free powder)
  • 1 tsp chai powder
  • ½ tsp cinnamon powder
  • A pinch of salt
  • ½ tsp baking powder
  • ½ tsp baking soda
  • ¼ cup oil
  • ½ cup yogurt
  • 1 tsp vinegar
  • 1/3 cup Luke warm milk
  • 2 tbs walnuts chopped finely

Method

  1. Preheat the oven at 180 degree Celsius
  2. Sieve all-purpose flour in a bowl, Add Salt + Baking powder + Baking Soda + Spice powder(Chai & cinnamon) + Splenda + grated carrot + walnuts. Whisk all these together.
  3. Mix yogurt + oil in a separate bowl, whisk together to combine.
  4. Pour the above wet mixture to the dry ingredients. Mix & combine well. Add milk & vinegar to the batter (Start by adding half the quantity of the milk & then add the rest based on the consistency. It shouldn’t be very thin)
  5. Grease the cake tin with oil
  6. Pour the batter in the cake tin and place it inside the oven. Bake for 25-30 mins
  7. Check the cake with a skewer after 25 minutes by poking it in. If it comes out clean, it’s ready. If not, keep for some more time.
  8. Take the cake out of the oven, and let it cool. Then using a knife, loosen the edges, and take the cake out. Serve with a dusting of powdered sugar or frost it with some cream cheese frosting and enjoy the light & spongy carrot cake with tea, coffee or just as it is!


RASMALAI

Rasmalai really doesn’t need any introduction. I guess most of them just love it. I prepared it & it turned out so professional & tasty that no one could actually believe that it was made at home. I had used Haldiram’s Rasgullas as I had very less time to prepare the Rasgullas at home. For those who don’t eat readymade rasgullas, I will be posting the recipe to make them at home soon. I hope you try it and let me know your experience. Happy cooking!

Rasmalai

Ingredients:

  • Milk – 1 ltr (Preferably use Buffaloes milk)
  • Milk Maid – ½ tin (200 gms) (you can use just sugar also, but milkmaid gives that thick and smooth texture to the milk)
  • Sugar (As per taste)
  • Pistachios – 50 gms (Chopped)
  • Almonds – 50 gms (Chopped)
  • Elaichi Powder – 1/4 tsp (Cardamom)
  • Nutmeg Powder – ¼ tsp
  • Kesar –  a pinch (Saffron)
  • Rasgullas – 1 tin of Haldiram
  • Chilled Water – 1 ltr

Instructions:

  1. Drain all the sugar syrup from the Rasgullas
  2. Soak the Rasgullas in Chilled water for around 15 – 20 mins
  3. Squeeze the water from rasgullas and keep them aside
  4. In a pan heat Milk and then add milkmaid to it
  5. Take some kesar strands and add warm to it. (I had added yellow color also for the bright yellow look)
  6. Mix it with the milk that is in the Pan
  7. Let the milk come to boil. Add Nutmeg + Elaichi powder. Keep stirring continuously.
  8. Add Sugar (I added around 3-4 tsp as I don’t like very sweet rasmalai)
  9. Let the Milk boil till the quantity becomes half & the consistency is a little thicker
  10. Add the chopped dried fruits
  11. Let the Rasmalai cool down
  12. Add the Rasgullas to it.
  13. Let it rest in the fridge for at least 2-3 hours (More the time better it is)
  14. Serve chilled

Quick Eggless Oreo Decadent Cake

Sometime it becomes too difficult to think on the spur of the moment  what could be served for desserts, especially when we have a surprise visit by guests. We all look out for options which are easy , quick & delicious. I’m sure after all the efforts put in making the main course & starters we all compromise on desserts by just serving some ready made sweets or may be ice creams. I prepared this Oreo decadent cake within 10 mins (5 mins for baking & 5 mins prep time) in microwave. It turned out just perfectly delicious. I served it hot with Vanilla ice cream. My family enjoyed it to the core. Hope you too try out this recipe & enjoy eating it.

Oreo Decandent

Ingredients

– 20 oreo biscuits 
– 1 cup luke warm milk
– 3/4 tsp baking powder
– 1/4 tsp baking soda
– 2 tbs powdered sugar
– 1/2 cup chocolate chunks

Method

1. Blend all the biscuits to a fine powder
2. Add sugar + milk + baking powder and baking soda and blend it again for 40 – 50 seconds
3. Pour half the batter into a greased glass bowl then add the chocolate chunks.
4. Add the remaining batter
and microwave it for 5-6 mins.
5. Check if the cake is done by inserting a toothpick.. if it comes out clean the cake is done,else microwave it for a min more
6. Cool the cake to room temp…remove it from the bowl and pour chocolate ganache on it
7. Serve it with vanilla ice-cream…

Tastes much better if eaten hot with ice-cream..

Notes :

  •  I used Chocolate ganache to pour over the cake to make it more sinful. You can use chocolate sauce or powdered sugar.
  • To make chocolate ganache, Take equal amount of cream & compound chocolate. Heat the Cream and add chocolate pieces to it. Mix till the Chocolate melts completely . Add a scoop of butter for the shine. Let it cool. Once cooled pour it over the Cake.

Microwave Eggless Mini Black Forest Cake

Following the tradition I have always baked cakes in the Oven. To watch the cake bake for 30 mins at times really tries my patience. Always wondered If I could quicken this process. Yesterday I tried baking this Mini Black Forest cake into the Microwave. Believe me the cake was ready in 5.30 mins..It did turn out soft & fluffy.. But only 1 thing that I observed is that it tastes much better if it is refrigerated for 5-6 hrs..(Absorbs moisture & becomes softer)I hope you guys too try it and enjoy the cake.Microwave Cake

EGGLESS MICROWAVE BLACK FOREST CAKE

Ingredients
Dry Ingredients:
• All Purpose Flour – 1¼ Cup
• Powdered Sugar – ¼ Cup
• Baking Soda – 1/2 Tsp
• Baking Powder -1 Tsp
• Coco Powder – 1 Tsp
• Wet Ingredients: Butter – ⅓ Cup
• Condensed Milk – ½ Cup
• Vanilla Extract – 1 Tsp
• Vinegar – 1 ¼ Tsp
• Milk – ½ cup (Luke warm)
• Oil for Greasing the Bowl

Icing:
1. Whipping Cream – 1 ½ cup
2. Powder Sugar – 3 – 4 Tsp.
3. Vanilla – 1 tsp
4. Red Cherries – ½ tin
5. Sugar Syrup – you can use the Cherry syrup from the tin
6. White Chocolate Shavings

Instructions
For the Cake:
1. Grease a Microwave Safe bowl or container with sufficient oil. I used 2 bowls since I wanted to make mini Black Forest cakes
2. Beat Butter & Condensed milk in a bowl for around 2-3 mins until it is fluffy
3. Add sugar to it & whisk for 2-3 more mins.
4. Add Vanilla + Vinegar & mix well.
5. Add ½ the milk mix well & then add the other half. Keep this wet mixture aside
6. In a separate container, sieve in the flour, baking powder, baking soda & mix well.
7. Add the flour (in parts) into the wet ingredients & mix well.
8. Pour the Batter into the 2 containers (Divide into equal qty. Please ensure that the container is big enough since the cake double up in quantity)
9. Microwave the cake for 6 minutes (1 bowl at a time). Mine was done in 5:30 minutes and my microwave is of 900 watts. Check with a toothpick at about 5:00 if it comes out clean, cake is ready. If not, microwave for another 30 second.
10. Take the cake out and let it cool to room temperature. Then turn it upside down on plate.

For the icing
1. Make sure that cream is chilled
2. In a bowl add the chilled cream and start to whip the cream using a beater. When the cream reaches a soft peak add the powdered sugar & vanilla.
3. Whip further until it reaches the stiff peak.
4. Refrigerate the cream for around 10 mins. The whipping cream is ready!!
5. Cut cake into three layers horizontally. Transfer the layers to a plate.
6. Apply a wee bit of cream in the center of the turn table and place the bottom most cake layer
7. Brush some sugar syrup over the cake. Now add a dollop of cream and spread a good ½ inch layer
8. Place some cherries (Remove the seeds & chopped).Place another layer and repeat.
9. Now for the final layer take a big dollop of cream and then spread it on top as well on sides. Then make it smooth! Make a thin layer. Now place this in the freezer for 30 mins.
10. After 30 mins, add a good dollop of cream to it and spread using a spatula or a long knife/palette knife and give a good finishing.
11. Now add the remaining cream to a piping bag fitted with a star nozzle. Pipe with circular motion on top which makes rosettes.
12. And pipe and lift on bottom.
13. Sprinkle White chocolate shavings all over sides and top.
14. A cherry on the top of each rosette.


Mango Icecream

It’s absolute summer & I guess we all look out for options to beat this heat. I’m sure Ice-creams could be one of the best options. Initially I had learned making ice-creams which involved making the base. Letting it set for a day & then prepare the actual ice-cream. I always felt that the 2 days wait always made my excitement droop. I prepared this yummy mango ice-cream without really waiting for so long. It is a very simple & a quick recipe. And believe me no compromise with the readymade ice-creams that we buy. Mango Icecream

Ingredients

1. 2 Cups whipping cream 2. ½ cup condensed milk (you can increase the quantity as per the sweetness you want. I don’t like very sweet ice creams) 3. 2 Mangoes (I used Alphonso mangoes) 4. ½ cup milk

Instructions

1. Blend the mangoes to make a pulp. Keep it aside

2. In a bowl start beating the Whipping cream with a hand blender until it reaches a soft peak

3. Add the condensed milk(Always adjust the sweetness after adding the pulp since the fruit has its own sweetness) & continue beating the cream till it reaches a stiff peak

4. Once the cream reaches a stiff peak add 3/4 of the mango pulp , 1/2 cup milk & continue beating.

5. Add the rest of the mango pulp & mix it with a spatula or a spoon (It gives the swirl effect)

6. Pour the Mixture into an air tight container (Ensure it is air tight else there will be water crystal formation)

7. Freeze it to set for around 7-8 hrs.

Note : How Does the Whipping Cream Peaks look like 😉 Technique-Whipping

No bake Peanut Butter Bars

No Bake Peanut butter bar 
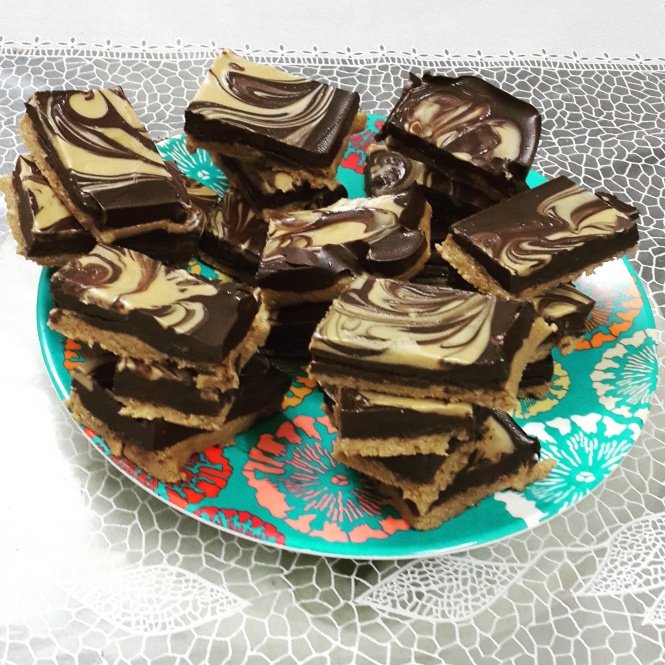
I prepared these peanut butter bars with a lot of ease. Looking at the gorgeous design on them most of them will say “it seems to be a complicated recipe” ,but the secret is that it is the most simple & easy recipe that anybody can make. They taste amazing too. I prepared them using sugar free chocolate to cut down a bit of calories  (Not that it’s absolutely guilt free, but still cutting down some of it.. 😉 lol) Here goes the Recipe. Do try it out!!

Ingredients

200 gms digestive biscuits

1/3 cup melted butter

1/2 cup peanut butter (120 gms)

200 gms dark chocolate (I used sugar free, You can use regular one too)

2 tbs peanut butter (for the chocolate)

2 tbs peanut butter(for the marble design)

Note : Require parchment paper & a square tin (8X8 inches) to set the peanut bars

No Bake Peanut butter bar 2

Instructions

1. In a food processor crush all the digestive biscuits. Once it is grounded add the melted butter & the ½ cup of peanut butter. Again blend well till all the ingredients form into sand like texture.

2. Grease the square tin & place the parchment paper on to it. (ensure that it is big enough to pull the bars out when they are set)

3. Spread the biscuit mixture evenly in the tin. Press it gently with the back of a spoon or spatula to make a smooth layer.

4. In a double boiler melt the chocolate & 2 tbs of peanut butter. Mix well until it melts & combine properly.

5. Now pour this melted chocolate on to the biscuit layer in the tin.

6. Spread it well covering all the corners & ensuring a smooth even layer.

7. In a separate pan melt the other 2 tbs of peanut butter

8. With the help of a spoon pour the peanut butter on to the melted chocolate layer. Pour drops on different areas(don’t pour all at once in one place, since we need to create a marble effect)

9. Make swirls with the help of a butter knife or back of the spoon to create marble effect texture 10. Refrigerate it to set for around 3-4 hrs

11. Once set with the help of the parchment paper pull the slab out & cut into bars. The peanut butter bars are ready 

Eggless White Forest Cake

I don’t think I require to write any thing about this cake. The pic of it will say it all 🙂 . This was my first attempt to make a white forest. I always had an upper hand on the chocolate cakes. I was a little skeptical of how would it turn out. But it did came out really well..More than what I expected. It looks beautiful & indeed delicious. Hope you will try it too.

white forest

Here goes the recipe.. Happy Baking 🙂

Ingredients

Dry Ingredients:

  1. All Purpose Flour – 1¼ Cup
  2. Powdered Sugar – ¼ Cup
  3. Baking Soda – 1/2 Tsp
  4. Baking Powder -1 Tsp

Wet Ingredients:
1. Butter – ⅓ Cup
2. Condensed Milk – ½ Cup
3. Vanilla Extract – 1 Tsp
4. Vinegar – 1 ¼ Tsp
5. Milk – ½ cup (room temperature)

Icing:
1. Whipping Cream – 1 ½ cup
2. Powder Sugar – 3 – 4 Tsp.
3. Vanilla – 1 tsp
4. Red Cherries – ½ tin
5. Sugar Syrup – you can use the Cherry syrup from the tin
6. White Chocolate Shavings

Instructions

For the Cake:
1. Pre-heat Oven at 180C for around 10 mins.
2. Beat Butter & Condensed milk in a bowl for around 2-3 mins until it is fluffy
3. Add sugar to it & whisk for 2-3 more mins.
4. Add Vanilla + Vinegar & mix well.
5. Add ½ the milk mix well & then add the other half. Keep this wet mixture aside
6. In a separate container, sieve in the flour, baking powder, baking soda & mix well.
7. Add the flour (in parts) into the wet ingredients & mix well.
8. Pour the Batter into a Greased 7” or 9” cake tin. Level the batter by tapping the tin twice
9. Place the tin into the Oven on the middle rack & bake for 30 – 35 mins
10. Bake for 30-35 mins (Keep an eye when the cake starts leaving sides & the color starts changing)
11. After 30 mins insert a toothpick in the center, if it comes out clean the cake is done else bake for another 5 mins.
12. Remove the cake from the oven. Let it rest for 10 mins. Then turn it upside down on plate.
Let the cake cool down completely before you start with the icing.

For the icing
1. Make sure that cream is chilled
2. In a bowl add the chilled cream and start to whip the cream using a beater. When the cream reaches a soft peak add the powdered sugar & vanilla.
3. Whip further until it reaches the stiff peak.
4. Refrigerate the cream for around 10 mins. The whipping cream is ready!!
5. Cut cake into three layers horizontally. Transfer the layers to a plate.
6. Apply a wee bit of cream in the center of the turn table and place the bottom most cake layer
7. Brush some sugar syrup over the cake. Now add a dollop of cream and spread a good ½ inch layer
8. Place some cherries (Remove the seeds & chopped).Place another layer and repeat.
9. Now for the final layer take a big dollop of cream and then spread it on top as well on sides. Then make it smooth! Make a thin layer. Now place this in the freezer for 30 mins.
10. After 30 mins, add a good dollop of cream to it and spread using a spatula or a long knife/palette knife and give a good finishing.
11. Now add the remaining cream to a piping bag fitted with a star nozzle. Pipe with circular motion on top which makes rosettes.
12. And pipe and lift on bottom.
13. Sprinkle White chocolate shavings all over sides and top.
14. A cherry on the top of each rosette.


Eggless Oreo CupCakes

Oreo Cup Cakes

These black beauties were so delicious & tempting that nobody could resist eating just one. I prepared these for the mother’s day. It is a very simple recipe full of oreo treat.It has Oreo in the base , the frosting & the topping . So kind of Triple Oreo treat. I’m sure oreo is everybody’s favourite. I had loads of fun making it along with my little niece. Hope you guys try it & enjoy it too.

Ingredients:

For the batter:
 1 cup plain flour
 200 gm of condensed milk
 1 tbsp coco powder
 4 tbsp dark choco (melted in double boiler or microwaved)
 3/4 cup buttermilk
 1/2 tbsp milk powder
 1/2 tbsp powdered sugar
 1/2 tsp baking powder
 1/2 tsp soda bicarbonate
 2 tbsp butter (softened at room temperature)
 1 tsp vanilla essence
 2 ½ packets of oreo biscuits
For the frosting:
 100 gms butter (room temperature)
 225 powdered sugar
 1 1/2 tsp milk
 1/2 packet oreo (Crushed – Ensure to remove the cream before crushing it to powder. Else the cake icing will be too sweet)
 1/4 tsp vanilla

Instructions:

1. Preheat the Oven at the Maximum
2. Take a bowl and place a sieve over it in.
3. Add the all-purpose flour, milk powder, powdered sugar, cocoa powder and put them through the sieve.
4. Take another bowl, add the condensed milk, soft butter, vanilla extract in it and whisk them well.
5. While whisking the above mixture, start adding the flour mixture and the buttermilk to it simultaneously.
6. After the whisking process, Add Melted Chocolate to the batter & Mix well. Now add the baking powder and soda bicarbonate to the mixture.
7. Scrape the sides of the bowl with a spatula and whisk the mixture again.
8. Place Oreo biscuit in each paper cups
9. Use an ice-cream scoop to fill the paper cups with the batter.
10. Once the batter is filled into the paper cups, immediately put them into the oven and bring down the temperature to 180 degrees. After around 15-20 minutes, get the cupcakes out of the oven and poke in a skewer in one of the cupcakes. If the skewer comes out clean, your cupcakes are ready.
11. Place the cupcakes on a cooling rack and allow them to cool down completely.

Frosting
 1.Start by whisking the butter till it looks light and fluffy
 2.Add the powdered sugar in parts and again beat it using the hand mixer
 3.While using the hand mixer add a drop of vanilla extract & the milk
 4.Once the mixture binds together,Add the finely crushed oreo powder & mix well
 5.Fill the Piping bag with the frosting & make a swirl on each cup cake
 6. Place the Oreo biscuit on top of the frosting


Orange Kheer

Orange Kheer


Orange Kheer

Orange kheer is one of the most quickest,easiest & tasty recipe that I have made.  I made this on my vacation for my family members, I stayed at Ramgarh completely disconnected from urbanization & very close to the nature , surrounded by the hills & greenery all around. It was basically a digital detox for me. I love to cook on my vacation and destress myself.

So my menu for the day was Veg Cheese balls & Cutlets for starters , Biryani & Raita for main course &  Orange kheer for dessert.

There were a few oranges that were left & a lot of milk in the fridge. It just struck me make a sweet dessert for all.  I just followed my instinct to make this kheer. It turned out great. My family just had one word “Awesome”.


Ingredients

2 Oranges (Remove the skin & seeds) and cut into small pieces
10 tsp Sugar
120 gms of paneer (grated)
1ltr whole milk
1 tsp of soaked rice (raw)

Instructions

1. Make a paste of the soaked rice (you can use cornflour mixed with 1/4 cup of milk. I used rice paste since cornflour wasn’t available)
2. In a heavy bottom pan boil the milk + sugar over medium to high heat. Keep stiring to prevent the burning of milk.
3. Boil the milk till it reduces to half its quantity
4. Add the half of the grated paneer & the rice paste.
5. When the milk becomes a little thicker Add rest of the paneer to it.
6. Boil for more 5-10 mins.
7. Once the kheer is cooled refrigerate it for at least 1 hr.
8. Add the oranges and a bit of orange zest to the kheer.
9. Again refrigerate it for couple of hrs.

The kheer tastes much better when it is served chilled.