Mango Icecream

It’s absolute summer & I guess we all look out for options to beat this heat. I’m sure Ice-creams could be one of the best options. Initially I had learned making ice-creams which involved making the base. Letting it set for a day & then prepare the actual ice-cream. I always felt that the 2 days wait always made my excitement droop. I prepared this yummy mango ice-cream without really waiting for so long. It is a very simple & a quick recipe. And believe me no compromise with the readymade ice-creams that we buy. Mango Icecream

Ingredients

1. 2 Cups whipping cream 2. ½ cup condensed milk (you can increase the quantity as per the sweetness you want. I don’t like very sweet ice creams) 3. 2 Mangoes (I used Alphonso mangoes) 4. ½ cup milk

Instructions

1. Blend the mangoes to make a pulp. Keep it aside

2. In a bowl start beating the Whipping cream with a hand blender until it reaches a soft peak

3. Add the condensed milk(Always adjust the sweetness after adding the pulp since the fruit has its own sweetness) & continue beating the cream till it reaches a stiff peak

4. Once the cream reaches a stiff peak add 3/4 of the mango pulp , 1/2 cup milk & continue beating.

5. Add the rest of the mango pulp & mix it with a spatula or a spoon (It gives the swirl effect)

6. Pour the Mixture into an air tight container (Ensure it is air tight else there will be water crystal formation)

7. Freeze it to set for around 7-8 hrs.

Note : How Does the Whipping Cream Peaks look like 😉 Technique-Whipping

No bake Peanut Butter Bars

No Bake Peanut butter bar 
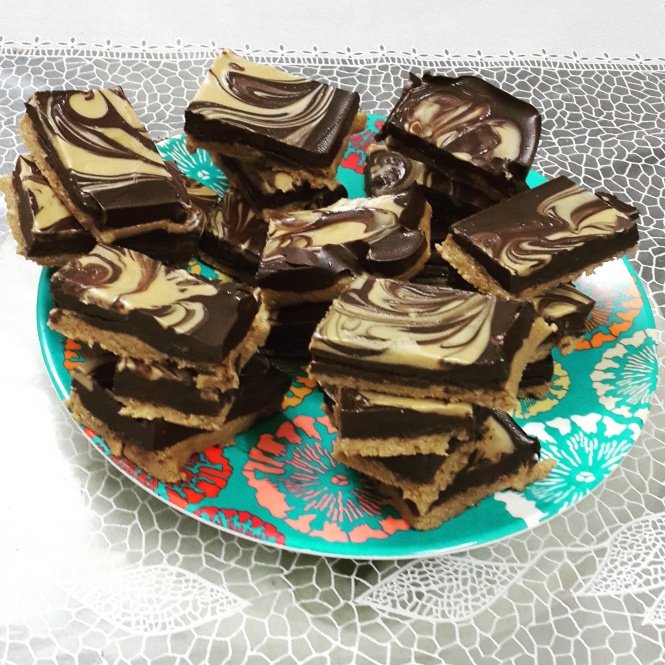
I prepared these peanut butter bars with a lot of ease. Looking at the gorgeous design on them most of them will say “it seems to be a complicated recipe” ,but the secret is that it is the most simple & easy recipe that anybody can make. They taste amazing too. I prepared them using sugar free chocolate to cut down a bit of calories  (Not that it’s absolutely guilt free, but still cutting down some of it.. 😉 lol) Here goes the Recipe. Do try it out!!

Ingredients

200 gms digestive biscuits

1/3 cup melted butter

1/2 cup peanut butter (120 gms)

200 gms dark chocolate (I used sugar free, You can use regular one too)

2 tbs peanut butter (for the chocolate)

2 tbs peanut butter(for the marble design)

Note : Require parchment paper & a square tin (8X8 inches) to set the peanut bars

No Bake Peanut butter bar 2

Instructions

1. In a food processor crush all the digestive biscuits. Once it is grounded add the melted butter & the ½ cup of peanut butter. Again blend well till all the ingredients form into sand like texture.

2. Grease the square tin & place the parchment paper on to it. (ensure that it is big enough to pull the bars out when they are set)

3. Spread the biscuit mixture evenly in the tin. Press it gently with the back of a spoon or spatula to make a smooth layer.

4. In a double boiler melt the chocolate & 2 tbs of peanut butter. Mix well until it melts & combine properly.

5. Now pour this melted chocolate on to the biscuit layer in the tin.

6. Spread it well covering all the corners & ensuring a smooth even layer.

7. In a separate pan melt the other 2 tbs of peanut butter

8. With the help of a spoon pour the peanut butter on to the melted chocolate layer. Pour drops on different areas(don’t pour all at once in one place, since we need to create a marble effect)

9. Make swirls with the help of a butter knife or back of the spoon to create marble effect texture 10. Refrigerate it to set for around 3-4 hrs

11. Once set with the help of the parchment paper pull the slab out & cut into bars. The peanut butter bars are ready 

Eggless White Forest Cake

I don’t think I require to write any thing about this cake. The pic of it will say it all 🙂 . This was my first attempt to make a white forest. I always had an upper hand on the chocolate cakes. I was a little skeptical of how would it turn out. But it did came out really well..More than what I expected. It looks beautiful & indeed delicious. Hope you will try it too.

white forest

Here goes the recipe.. Happy Baking 🙂

Ingredients

Dry Ingredients:

  1. All Purpose Flour – 1¼ Cup
  2. Powdered Sugar – ¼ Cup
  3. Baking Soda – 1/2 Tsp
  4. Baking Powder -1 Tsp

Wet Ingredients:
1. Butter – ⅓ Cup
2. Condensed Milk – ½ Cup
3. Vanilla Extract – 1 Tsp
4. Vinegar – 1 ¼ Tsp
5. Milk – ½ cup (room temperature)

Icing:
1. Whipping Cream – 1 ½ cup
2. Powder Sugar – 3 – 4 Tsp.
3. Vanilla – 1 tsp
4. Red Cherries – ½ tin
5. Sugar Syrup – you can use the Cherry syrup from the tin
6. White Chocolate Shavings

Instructions

For the Cake:
1. Pre-heat Oven at 180C for around 10 mins.
2. Beat Butter & Condensed milk in a bowl for around 2-3 mins until it is fluffy
3. Add sugar to it & whisk for 2-3 more mins.
4. Add Vanilla + Vinegar & mix well.
5. Add ½ the milk mix well & then add the other half. Keep this wet mixture aside
6. In a separate container, sieve in the flour, baking powder, baking soda & mix well.
7. Add the flour (in parts) into the wet ingredients & mix well.
8. Pour the Batter into a Greased 7” or 9” cake tin. Level the batter by tapping the tin twice
9. Place the tin into the Oven on the middle rack & bake for 30 – 35 mins
10. Bake for 30-35 mins (Keep an eye when the cake starts leaving sides & the color starts changing)
11. After 30 mins insert a toothpick in the center, if it comes out clean the cake is done else bake for another 5 mins.
12. Remove the cake from the oven. Let it rest for 10 mins. Then turn it upside down on plate.
Let the cake cool down completely before you start with the icing.

For the icing
1. Make sure that cream is chilled
2. In a bowl add the chilled cream and start to whip the cream using a beater. When the cream reaches a soft peak add the powdered sugar & vanilla.
3. Whip further until it reaches the stiff peak.
4. Refrigerate the cream for around 10 mins. The whipping cream is ready!!
5. Cut cake into three layers horizontally. Transfer the layers to a plate.
6. Apply a wee bit of cream in the center of the turn table and place the bottom most cake layer
7. Brush some sugar syrup over the cake. Now add a dollop of cream and spread a good ½ inch layer
8. Place some cherries (Remove the seeds & chopped).Place another layer and repeat.
9. Now for the final layer take a big dollop of cream and then spread it on top as well on sides. Then make it smooth! Make a thin layer. Now place this in the freezer for 30 mins.
10. After 30 mins, add a good dollop of cream to it and spread using a spatula or a long knife/palette knife and give a good finishing.
11. Now add the remaining cream to a piping bag fitted with a star nozzle. Pipe with circular motion on top which makes rosettes.
12. And pipe and lift on bottom.
13. Sprinkle White chocolate shavings all over sides and top.
14. A cherry on the top of each rosette.


Eggless Oreo CupCakes

Oreo Cup Cakes

These black beauties were so delicious & tempting that nobody could resist eating just one. I prepared these for the mother’s day. It is a very simple recipe full of oreo treat.It has Oreo in the base , the frosting & the topping . So kind of Triple Oreo treat. I’m sure oreo is everybody’s favourite. I had loads of fun making it along with my little niece. Hope you guys try it & enjoy it too.

Ingredients:

For the batter:
 1 cup plain flour
 200 gm of condensed milk
 1 tbsp coco powder
 4 tbsp dark choco (melted in double boiler or microwaved)
 3/4 cup buttermilk
 1/2 tbsp milk powder
 1/2 tbsp powdered sugar
 1/2 tsp baking powder
 1/2 tsp soda bicarbonate
 2 tbsp butter (softened at room temperature)
 1 tsp vanilla essence
 2 ½ packets of oreo biscuits
For the frosting:
 100 gms butter (room temperature)
 225 powdered sugar
 1 1/2 tsp milk
 1/2 packet oreo (Crushed – Ensure to remove the cream before crushing it to powder. Else the cake icing will be too sweet)
 1/4 tsp vanilla

Instructions:

1. Preheat the Oven at the Maximum
2. Take a bowl and place a sieve over it in.
3. Add the all-purpose flour, milk powder, powdered sugar, cocoa powder and put them through the sieve.
4. Take another bowl, add the condensed milk, soft butter, vanilla extract in it and whisk them well.
5. While whisking the above mixture, start adding the flour mixture and the buttermilk to it simultaneously.
6. After the whisking process, Add Melted Chocolate to the batter & Mix well. Now add the baking powder and soda bicarbonate to the mixture.
7. Scrape the sides of the bowl with a spatula and whisk the mixture again.
8. Place Oreo biscuit in each paper cups
9. Use an ice-cream scoop to fill the paper cups with the batter.
10. Once the batter is filled into the paper cups, immediately put them into the oven and bring down the temperature to 180 degrees. After around 15-20 minutes, get the cupcakes out of the oven and poke in a skewer in one of the cupcakes. If the skewer comes out clean, your cupcakes are ready.
11. Place the cupcakes on a cooling rack and allow them to cool down completely.

Frosting
 1.Start by whisking the butter till it looks light and fluffy
 2.Add the powdered sugar in parts and again beat it using the hand mixer
 3.While using the hand mixer add a drop of vanilla extract & the milk
 4.Once the mixture binds together,Add the finely crushed oreo powder & mix well
 5.Fill the Piping bag with the frosting & make a swirl on each cup cake
 6. Place the Oreo biscuit on top of the frosting


Zero Oil Chana Masala

Healthy food can be delicious too!! O yes I prepared these zero oil chana masala without compromising on the taste. It turned out to be really delicious. All my family members just love it and it is prepared quite often now.

Zero Oil Chole

 INGREDIENTS

  • 250 gms boiled chickpea
  • 1 tsp tea leaves
  • 1 tsp baking soda
  • Salt to taste
  • 2 tsp coriander seeds
  • 1 tsp cumin seeds
  • 1 tsp black peppercorns
  • 1 tsp fennel seeds
  • ½ tsp carom seeds
  • 1 cinnamon stick
  • 4 – 5 green cardamom
  • 1 bay leaf
  • 4 – 5 dried red chillies
  • 2 tsp dried pomegranate seeds
  • A pinch asafoetida
  • 1 tsp ginger garlic paste
  • 1 tsp chana masala
  • 3 – 4 chopped green chillies
  • 1 tbsp tamarind paste

 INSTRUCTIONS

  • Boil Chickpea with tea leaves, soda, salt (Pressure cooker) .
  • Then stir fry the following ingredients:
  • Coriander, cumin seeds, black peppers, fennel seeds, carom seeds, cinnamon, cardamom, bay leaf, red chillies and pomegranate seeds. To this, add a pinch of asafoetida.Grind the masala to a fine powder.
  • Take some chickpeas (around ½ bowl) and grind them to fine paste.
  • Add rest of the boiled peas to a pan, add water until they are soaked (start to cook on slow flame); Add ginger garlic paste. Then add the chana masala + the grinded masala powder + the pea’s paste .Add some chopped chillies to this. Cook for a total of 20 to 25 minutes. Finally add the tamarind paste and mix well before you serve.


Gir Trip

We went to The Gir Forest National Park and Wildlife Sanctuary in 2011. It is the sole home of the Asiatic lions (Panthera leo persica) and is considered to be one of the most important protected areas in Asia due to its supported species.It was  awesome experiencing the open safari & viewing the wild animals in the open. Below are a few captures from the safari & the Junagarh Zoo that I visited.


Rajasthan Trip

Last winter I visited Rajasthan, a state of India, which literally means “Land of Great Kings”.It is a vast state, Unfortunately I could just visit Jasailmer & Jodhpur.I must say that when you visit Rajasthan indeed you feel like a King.Especially visiting the beautifully sculptured & carved Forts & Palaces constructed at different times by the great rulers.Within the the vicinity I visited Khuldhara Village,Khuri,Jaisalmer fort,longiwala,Mehrangarh & Umaid Bhavan.It was great to be at Longiwala,Place where the India Pakistan war took place. I felt a sense of Pride knowing how our soldiers fought. I was very lucky to have an opportunity to spend a night in the Thar Desert at Khuri.It was a very different experience to be completely disconnected with the digital world. No Television,No network coverage. The sunset at the desert was so beautiful.In addition to this,the warm friendly people and their life style and the rich and varied culture of Rajasthan fascinated me a lot.I have captured a few special shots which I have shared here…Hoping to give a glimpse of how beautiful & rich the Places are!!